NOVEMBER 2013 WORKSHOP “An Heirloom in a Day” with Sarah Rakestraw and Sue Hinde (report by Brenda Muller)
I was particularly looking forward to the goldwork day, as it was a style I had never tried before. There was a magnificent and tempting array of sparkly threads of all hues and styles, and specialist goldwork materials available for sale. For those of us who had not done goldwork before, as ever with the Embroiderer’s Guild, a whole new world of possibilities was opened up.
Our day started with setting up embroidery frames with our chosen silks and satins. We chose from a varied selection of designs for the goldwork. We were supplied with tracing paper patterns, a pack of exciting looking threads, beads and gold leather. I chose a tree, because I thought it might make up into a suitable Christmas card, though I was torn between an image of a lady that could have been used as a Madonna.
The first job was to pin the tracing paper designs onto the frames, and outline the design with tacking thread. Now this is a clever bit for the uninitiated! What you do is run a strong needle tip along each stitch from hole to hole to gently break the tracing paper. The paper will then lift off the fabric, leaving the tacking stitch outline.
Using appropriate shapes from the lifted tracing paper, cut out your chosen shapes in fine gold leather. Apply the leather to the fabric with tiny stab stitches made with ‘invisible thread which has been run through beeswax. Sew around the leather leaving enough of a gap to stuff in wadding to make a cushion under the leather shape. Embellishing the design with gold wire and special threads and beads comes next, and all these complications were ably demonstrated by Sue Hinde and her daughter Sarah. I won’t explain them here, they are too complicated. You wll have to come to the next Goldwork day if you want to find out more!
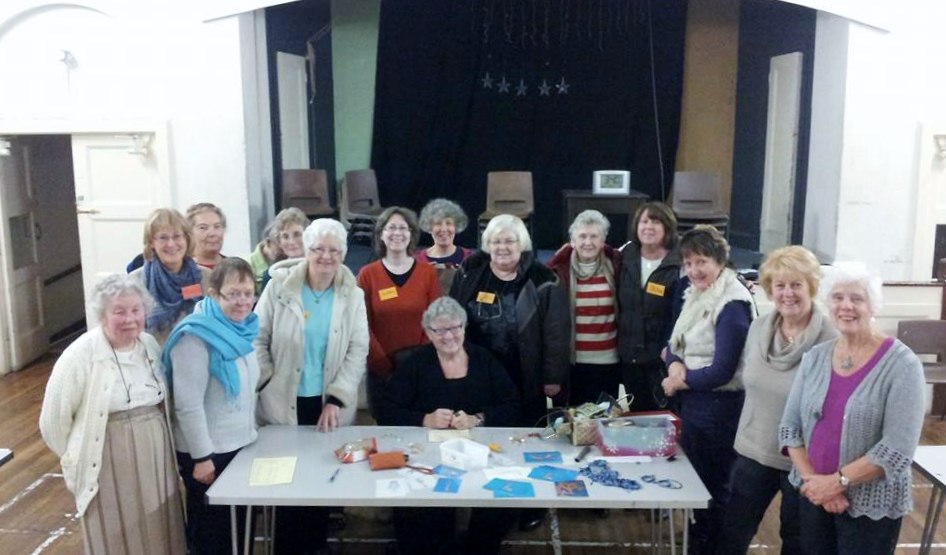
Nov 2013 WORKSHOP group photo
no images were found
AGM & OCTOBER 2013 TALK “The Corset Unlaced” by Gill Roberts (report by Kathy Green)
We all enjoyed a lovely afternoon following our A.G.M. with a talk by Gill Roberts, who has been a member of MEG for over 25yrs. Gill is an experienced designer and maker of the most beautiful embroidered corsets, some of which were on display.Gill opened the talk with the history of corsetry – the construction and art of the corset going back 400yrs.
Today the corset is used in costume and decorative art as in bride’s dresses (My Gypsy Wedding springs to mind). On screen we saw popular images of Victorian Costume Drama, bodices worn over a chemise. We saw a metal corset with a 13 inch waist, homemade corsets made with extensive quilting, embroidery and a piece of wood down the centre used to separate the breasts.Tight laced corsets which were worn 24/7 (no respite even when sleeping), and learned that steel eyelets were introduced in 1847 .
Gill talked about the various types of corsets – Nursing corsets (used when breastfeeding). Skeleton & Ribbon corsets, Under the Bust corsets were worn for sport such as tennis & horse riding, Neck corsets – taken from tribeswomen, each weighing 2kilos, Fetish corsetry – corset inspired tattoos and piecing. Burlesque artist’s use of corsets. Fashion corsets – Harley Davison theme. Men’s Corsetry – worn under uniforms.
We laughed at cartoon images of lacing up of corsets. The pictures and diagrams of the constricting of internal organs when wearing corset made us cringe. In the 1860’s The Grecian Bend – the introduction of the bustle. There was even a musical bustle made to celebrate Queen Victoria’s Jubilee, which played “God Save The Queen” when you sat down.
We went on to a demonstration with a live supermodel – our very own Sarah looking lovely in a corset made by Gill. Gill then went on to speak about how the corset was made – the materials used. – bones, fasteners, spiral steel, and 6 meters of lacing for each corset. Sarah commented. “Although it felt heavy it was quite light and comfortable to wear“. Gill closed with a talk about the pieces of work on display. All beautiful and so expertly made and embroidered. Well Done Gill- you had us all enthralled.


AUGUST 2013 WORKSHOP ” Initial Success” with Hilary McCormack (photographs & report by Janet Wilkinson)
One of the things I was looking forward to with this workshop was that I didn’t really know what we would be doing and that was exciting. The first surprise came with the requirements list and I saw we had to bring a selection of fabrics 18” square, much larger than I had anticipated. This was the obviously the time to go through my store of materials and use something special I had squirrelled away.
We were a big friendly group and Hilary got us started by showing examples of reverse applique work she had done as she developed the technique. She brought the early ones with mistakes as well as the successes and this was very useful for us as beginners. The star of the show was a beautiful large scale portrait of St John the Silent, which we will see next year at our Victoria Gallery exhibition.
We designed our images; based on letters of the alphabet, our own ideas or the excellent source book – Glass Painters Motif Library by Gear and Freestone. With Hilary’s guidance we sandwiched our patterned fabrics between calico and a plain top layer and zigzag machine stitched the design through. I never thought 8 layers of fabric would go through my machine! We made our own industrial music with 14 sewing machines all in action at the same time.
Then we came to the magical bit where you start cutting through the layers to reveal the different fabrics that make up the design. Until you actually start cutting, sharp tiny scissors needed, you don’t know quite what will emerge. It gives a stunning stained glass effect and even a simple piece with only 3 layers looks fabulous. The day sped by faster than any other workshop I can remember.
The test for the success/failure of a course is what happens when you get home, is it stuffed straight in a cupboard? Well not this one; I can’t wait to carry on cutting out my apple tree and I am going out in the garden to do so as soon as I have finished writing this. We will be having a table of work from this years MEG courses on show at the September tea party, 7/9/13. As part of that you will be able to see the lovely pieces from this workshop which includes American stars and stripes, birds, plants, trees, initials and symbolic patterns.


JULY 2013 TALK “So Who Did Invent The Sewing Machine” by Sue Sercombe (report by Dilys Parry)
Take a national survey and probably the answer would br Singer, but was he the true inventor of the sewing machine? Sue told us that the first inventions were industrial machines, with some used for leather shoe-making many years before Singer. Early machines were only capable of producing chain stitch, others lock stitch. the worked stitches went from side to side, not from back to front, so it was difficult to obtain an even tension and there were many thread breakages.
Most inventors took out patentsso when others, including Singer, tried to incorporate the previous inventions to improve machines they were in trouble. However they managed to come to some financial agreement and carry on. Singer was very successful with his designs and also invented a hire-purchase scheme. Now working people could buy his domestic sewing machines.
Sue illustrated her very interesting Talk with computer material. I foundthe idea of treadle machines shaped like lions fascinating, also the wooden sewing machine made by prisoners of war in Colditz wonderful and ingenious. Seeing Sue’s display of antique sewing machines reminded me of learning to sew on hand and treadle types. After the Talk I feel I need to research the characters who took part in inventing the sewing machine.
no images were found
JUNE 2013 WORKSHOP “Sculpting with Silk Paper” with Linda Rudkin (report by Nawal Gebreel)
We had an enjoyable day at the Guild using silk fibres to make 3D pieces made of silk paper. Linda Rudkin, a textile artist, ran the workshop. Linda has been working with natural fibres and dyes since her visit to Bayeux Tapestry in 2002. She has written a book on natural dyes and one in flower pounding.
We were inspired by Linda’s 3D forms sculpted with silk paper, such as shells, stones and vessels. Colour and pattern can be incorporated into the paper, which can also be stitched or beaded.
After Linda’s demonstration we all started by making a flat silk paper, using un-dyed mulberry and tussah silk tops and after that, the fun started when Linda showed us how to making a three-dimensional silk paper piece. We had to use a form e.g. stone, pebble, shell or a bowl to obtain the shape we wanted. We used silk hanky and we trapped flower petals for decoration and colour.
We used different solutions and textile medium to help the shape retain its form.
We all went home with lots of ideas.
no images were found
MAY 2013 TALK “Connected With Colour” by Ruth Isset (report by Marie Stacey)
We were very fortunate to be given an inspiring and uplifting talk by Ruth Issett on Saturday 18th May. Ruth showed a dense package of slides, illustrating her work and techniques, their vibrant colours exploding and intense, almost overpowering in their impact. She brought along a wide range of her work, including hangings, cushions and sketchbooks.
Ruth’s initial talent as a “natural draw-er” was evident from an early age, and she has a thorough grounding in dyeing, weaving, printing and embroidery. She held a variety of posts, ending up in adult education in Kent. For the past 20 years she has had a close working relationship with ArtVanGo, eg as a demonstrator of the use of Markel sticks. Ruth and her husband now live in an idyllic cottage and studio in rural Shropshire, and much of her current work relates to the surrounding landscape. The photos she showed us of those views, and the work they inspired, were really helpful in demonstrating her work processes.
Ruth was generous in sharing her practice and offering practical advice. The key features for me were:
-
layering fabrics, especially silk and cotton organdie, using a palette of colours she dyed herself;
-
cutting into it, drawing on it, or stitching;
-
using a range of simple stitches – running, fly, Cretan, couching, French knots;
-
with one over-riding concern :How will the colour work?
As Vicky said in her Vote of Thanks, “we have been mesmerised by your freedom with colour”. It was a great afternoon.


APRIL 2013 WORKSHOP & TALK “We Are Turning Japanese” by Katie Chaplin (report by Jean Mather)
Those of us booked on the “We Are Turning Japanese Day” on Saturday had no idea what a treat we had in store. The morning was set aside for the making of Kanzashi flower brooches. Katie Chaplin of “Japan Crafts”, a delightful and entertaining teacher, taught us how to turn small squares of beautiful Japanese patterned cotton into very pretty and quite passable brooches. I use the word “passable” as it apparently takes 10 years apprenticeship before one can become an expert. We then progressed to using two squares for each petal, thus blending the shades, and then progressed to making leaves. At this stage we were all wishing we had tiny Japanese fingers, which would have helped tremendously.
Katie explained how the Japanese roll out bolts of white silk, which are then covered in rice glue and left 24 hours to dry. This material is then dyed and cut up into squares, by machine, ready for assembly. Not only did Katie supply the lovely cotton material for our flower-making but she brought some of her beautiful stock of Japanese printed cotton fat quarters for sale, along with kits for making bags etc.
After all this hard work and after lunch, Katie dressed Sarah in a full formal kimono costume. So, whilst we all relaxed to watch and hear the history and details of the costume, Sarah was trying not to wilt under the weight and heat of all the wonderfully embroidered garments, ties, sashes, and various pieces of corset-like wrappings which were wound round her. To finish, we were entertained by Katie to a demonstration of a Japanese Tea Ceremony. A truly lovely day. Can we have Katie back, please?
no images were found
MARCH 2013 TALK by Sue Boardman, Janet Vance and Sue Sercombe who are members of Wirral EG (report by Pat Maher)
This month we had three ladies from Wirral E.G. to talk about their work. Sue Boardman told us she was known for her “stuff” and what “stuff” it was!. Based on the theory “don’t throw anything away” she had produced much original work, getting inspiration from things around her. An apron/coat was inspired by an old road map, a picture from her allotment and a quirky little hat was the result of a walk through Birkenhead Park. Fantastic!
Janet Vance, however, told us she did not consider herself a stitcher at all but, nevertheless, produced many unique items. Among these was a teacup and saucer from painted paper, a lampshade and some vases in a combination pof fabric and paper, a picture from bits and pieces etc. Stitcher or not her “messing about” as she called it was a great success.
Our third lady Sue Sercombe had been involved in all types of embroidery for many years and showed us firstly a beautiful beaded and lace wedding gown she had made for her daughter. Exquisite. Next was a pan velvet coat decorated with pink, dyed fabric cord, the detail……amazing! these were followed by scarab beetles,dragonflies, bags, needle-cases, cushions and many other items.
What an enjoyable afternoon we had.
no images were found
February 2013 WORKSHOP “3D Flowers in Free Machine Embroidery” with Anne-Marie Read (report by Val Heron)
I think most of you who went to Empress Mills would remember Anne-Marie Read, she is a very nice, helpful and friendly person (but I think all the people are in Empress Mills).
She started us off by drawing 6 petal shapes all the same on our dissolvable fabrics (solufleece) with a water soluble pen – the troubles started with the sewing machines.
Anne-Marie helped not only with the making of the flowers but also sorting some of the machines out – needles breaking, wrong thread used and one that refused to accept a new needle.
Mostly sorted, we then filled in our petal shapes and added a zigzag stitch around the edges to neaten the petals off. Using a beading wire, and starting off about ½inch from the top of the petal, we zigzagged down the petal leaving the wire sticking out, and the we dissolved the fabric. When I last did this (which was a long time ago) I had a lot of trouble with it, the fabric was like plastic, and not only was it not very good to sew on but it was a devil to dissolve. This fabric, however, was great (I might even do some more free machining).
After putting beads on 6 new wires to make the stamens we started making our flowers up with double sided tape and then florist’s tape.
There was a very friendly atmosphere in the class, and though many of the ladies said they couldn’t do free machine embroidery we all made a beautiful finished flower and displayed them altogether in a vase.
no images were found
January 2013 TALK “Talking Textiles” by Nawal Gebreel (report by Helen Patrick)
On 19th January 2013 MEG had an informative and interesting talk by Nawal Gebreel.
Nawal became interested in textiles from an early age learning from her mother and grandmother. Being lucky enough to travel to Afghanistan and many other exotic places Nawal was able to put her experiences and extensive training to use as an innovative textile designer specialising in fabric manipulation and print.
Nawal employs sumptuous fabrics and innovative colours to produces luxurious scarves that she has sold all around the world, but is currently based at Liverpool Bluecoat craft centre. The many scarves she brought along came to life when demonstrated on a willing model from the audience.
Nawal uses her extensive early travels for design ideas, but some of her work was based around weeds in her garden. She also draws inspiration from geometric forms, Japanese “shibori” and paper folding.
Nawal’s work uses a variety of techniques, including screen-printing, hand pleating and fabric manipulation. Indeed Nawal said fabric manipulation is her passion, and given any fabric or table napkin she is often tempted to see what effects she can produce. Nawal makes a prototype by folding, stitching and steaming the fabric and then the individually named designs evolve by being tried out in front of mirrors and friends until it feels right.
Nawal also runs many courses including felt bags, watercolour painting and bookmaking. Details on her website www.gebreel.com


